PD 23-06: Pending Pre-Conversion Incoming eICT Application Guidance
| Date: | 3/14/2023 |
| To: | Eligibility Staff |
| From: | Vivien Phan, WOOC ADSS |
| Reference: | N/A |
Background
There is a core issue in CalSAWS where pending incoming eICT applications dated pre-conversion may not be linked and could have a County of Responsibility issue.
How to Process Pending Pre-Conversion Incoming eICT Applications
Eligibility Workers must follow the steps belowsteps below:
-
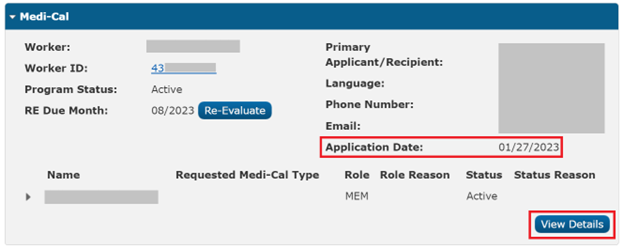
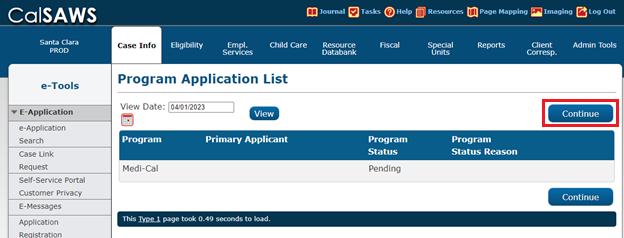
Go to Case Summary and obtain the <Application Date>. Then click on the View Details button under the <Program Block>.
-
Verify Application Source is <ICT>.

-
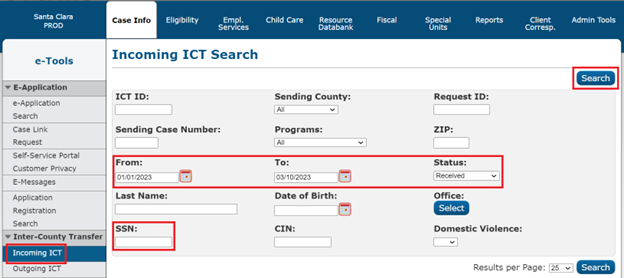
Go to Case Info > e-Tools > Inter-County Transfer > Incoming ICT. Enter the following fields on the Incoming ICT Search page, then click on the Search button.
- From = The first day of the application month
- To = The current date
- Status = Go through each of the status options. The most common ones are Canceled or Received. If a result shows up for a particular status, that is the status of the ICT.
- SSN = Applicant’s SSN. If no SSN, enter the Last Name and Date of Birth of the applicant.
-
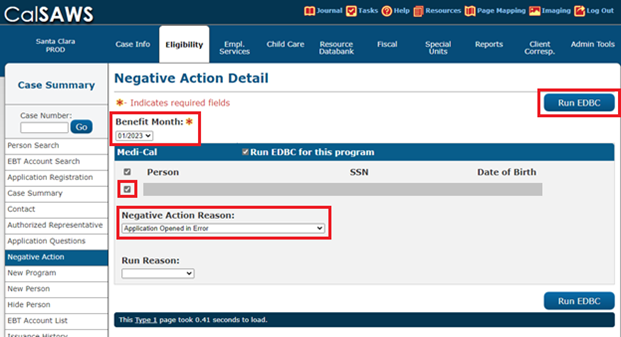
If ICT Status is <Canceled> and no new ICT is received,
- Select the <Application Month> for Benefit Month, check mark all household members, and select <Application Opened in Error> for Negative Action Reason.
- Click on the Run EDBC button and authorize the case.
- Contact the other county and request them to re-initiate the ICT.
-
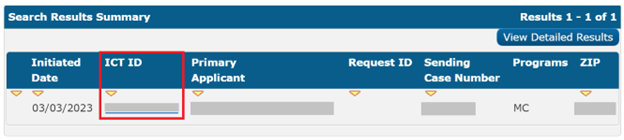
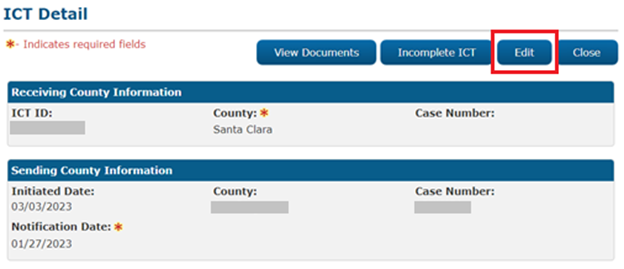
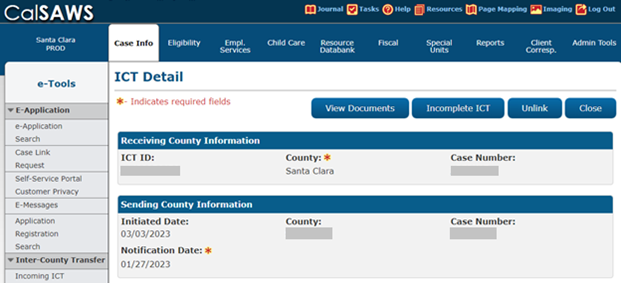
If ICT Status is <Received>, click on the ICT ID hyperlink.
-
Click on the Edit button.
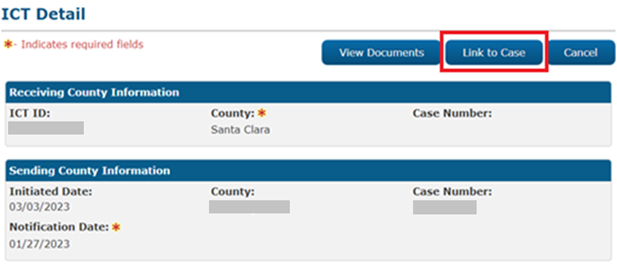
-
Click on the Link to Case button.
-
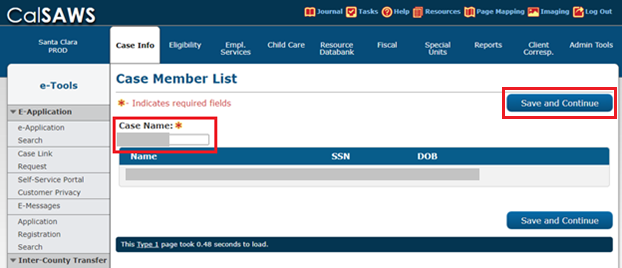
Mark the check box next to each household member under All People Associated with the ICT.

-
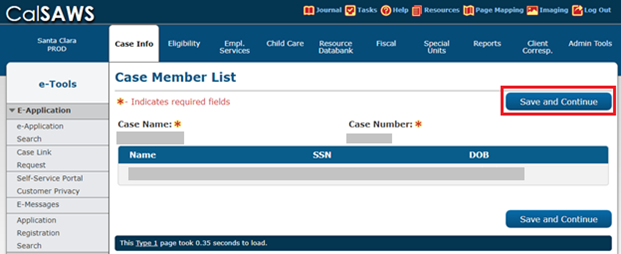
Enter <Case Name> in Case Member List page, then click on the Save and Continue button.
-
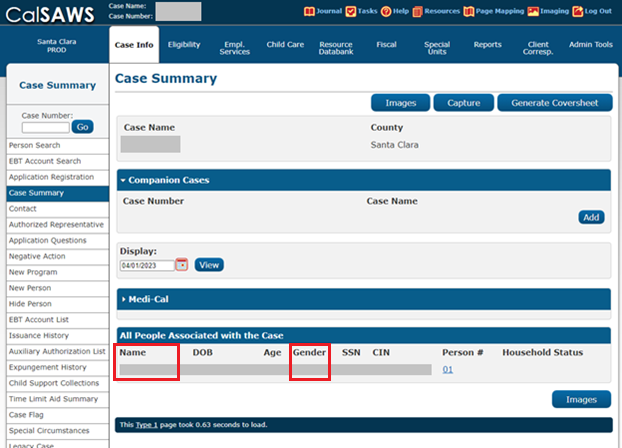
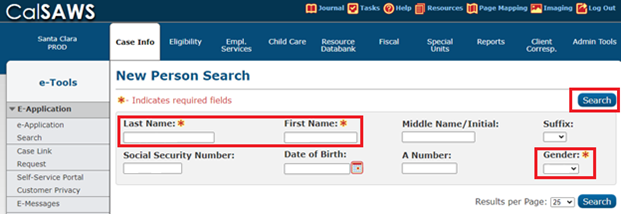
Go to Case Summary to obtain applicant's <Name> and <Gender>.
-
Enter applicant's <Last Name>, <First Name> , and <Gender>, then click on the Search button.
-
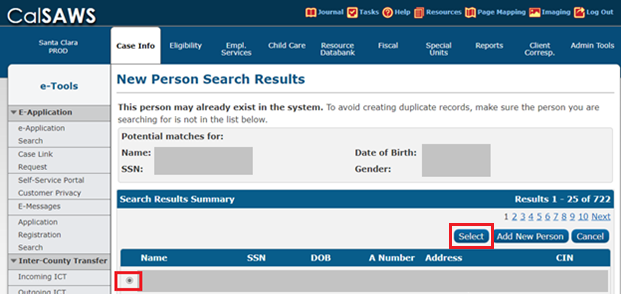
Click on the result corresponding to the applicant, then click on the Select button.
-
Confirm applicant information and click on the Continue button.

-
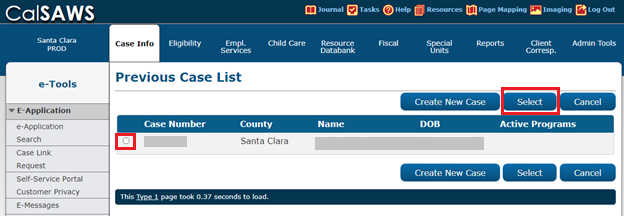
Select the radio button for the correct <Case Number> then click on the Select button.
-
Click on the Save and Continue button.
-
Click on the Continue button.
-
ICT Detail page appears to indicate the ICT ID is linked to the case. You can now process the ICT application according to current program policy.
-
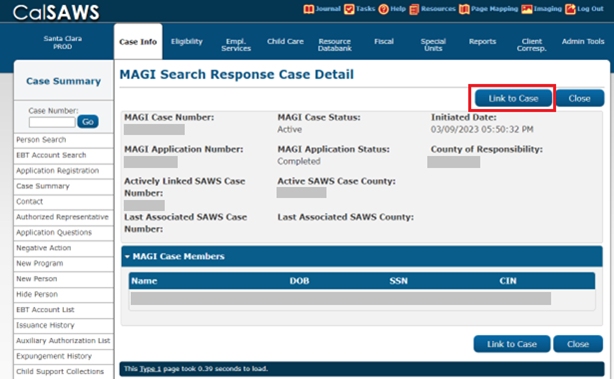
For incoming MAGI MC ICTs, before running EDBC, go to MAGI Search Response Case Detail page and click on the Link to Case button.
-
Run EDBC and authorize the case. Mail out the appropriate CalSAWS NOA(s) to the client.
-
Add a Journal Entry of all actions taken.
Implementation
This PD is effective immediately.
Kudos
Thank you to Tonya Pham and Yolanda Barragan for providing CalSAWS screenshots/instructions.