|
|
Supervised Job Search Component
- Complete the Non-Education, Non-Work Components steps 1-3 then continue with step 4 below.
- To enter Supervised Job Search participation, click on the [Add Participation][Add Participation] button below the Supervised Job Search component.

- The Supervised Job Search – Add New Participation window will pop-up.
Select the type of Supervised Job Search in the Type of TrainingType of Training drop-down field.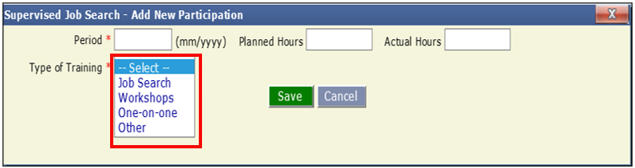
- Complete the Type of Training, Period (mm/yyyy) and Planned Hours fields.
Click [Save][Save].

If you select Job Search in the Type of TrainingType of Training field, notice that the Employment ContactsEmployment Contacts field will appear. Complete this field by entering the number of applications and/or interviews the CFET participant completed during this period.

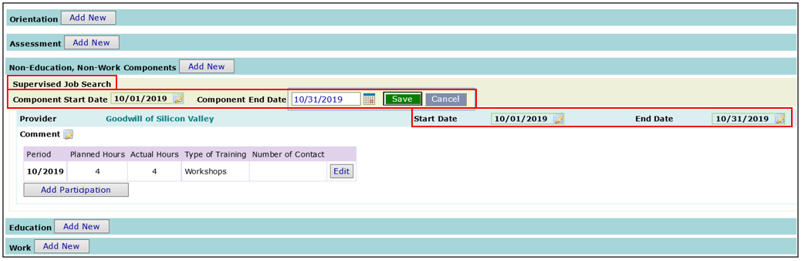
- Participant has been enrolled in the Supervised Job SearchSupervised Job Search component for 10/2019.
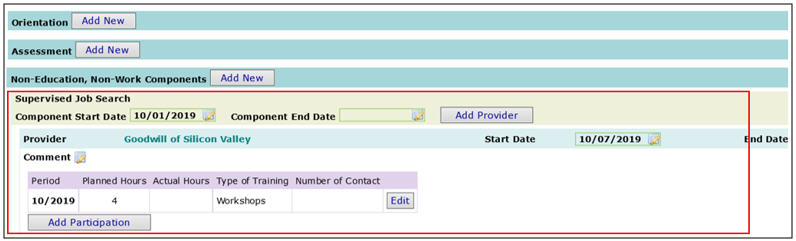
- The user will need to update the information in the Supervised Job Search component by clicking on the [Edit][Edit] button by the 5th of the following month to track the participant’s progress.
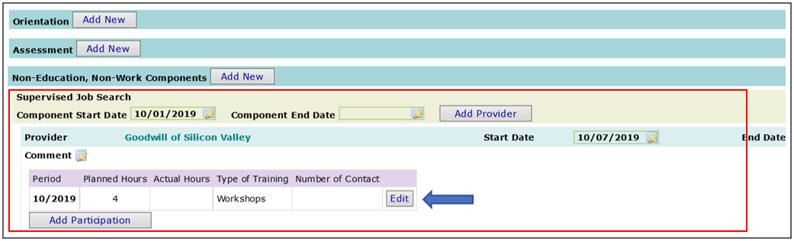
- The Supervised Job Search – Edit Participation window will pop-up.
Enter the participant’s Actual Hours (and the number of Employment Contacts if you selected Job Search as the Type of Training) that were completed for the specified Period (i.e., 10/2019).
Click [Save][Save].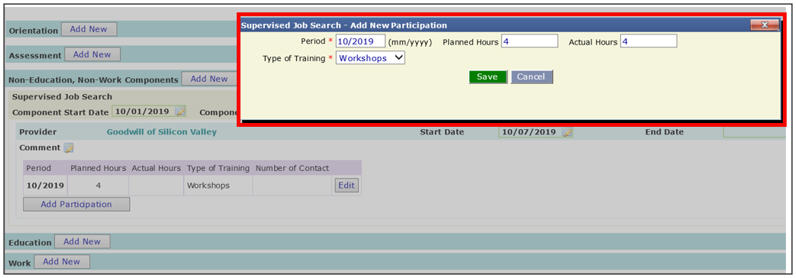
- The Supervised Job SearchSupervised Job Search component has been entered and completed for the Period of 10/2019.
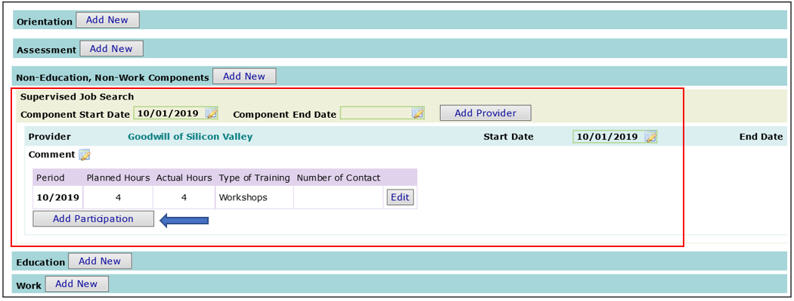
Note: To enter another Supervised Job Search component for the following Period/month (i.e., 11/2019), click on [Add Participation] button and continue making entries as specified above.
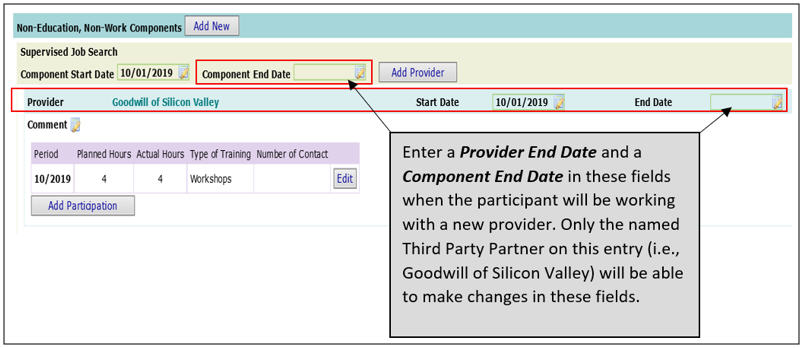
- End Dates: SCENARIO 1 - When the participant has completed all activities related to the provider’s Supervised Job Search component (i.e., the participant has now found employment through the provider’s Supervised Job Search services), the user will need to enter a Provider End Date.
Click on the Provider End DateProvider End Date field and a new field will open to allow the user to enter a Provider End Date.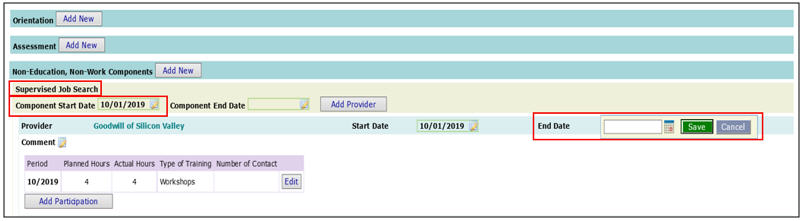
- Enter the Provider End Date and Click [Save][Save].
Now the Provider End Date appears in bold.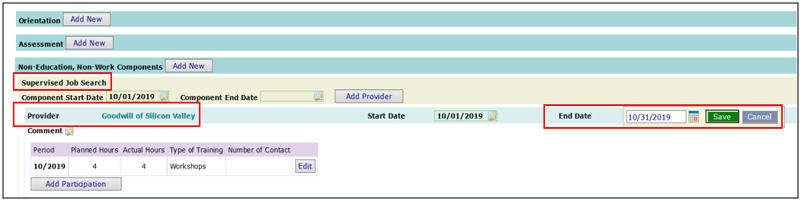
Note: if the user needs to edit or delete the Provider End Date field due to an erroneous entry, click on the small Calendar icon next to the date. Please use this sparingly as entries/deletions in this field may cause funding/payment delays or problems for Third Party Partners.
- Next, the user will need to enter the Component End Date and Click [Save][Save].
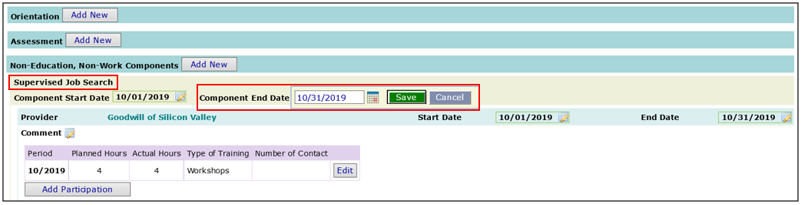
- Now, the entire Supervised Job SearchSupervised Job Search component has been End Dated.
-
End Dates: SCENARIO 2 – If the participant wants to engage the services of another Third Party Partner for the same open ComponentThird Party Partner for the same open Component, users will need to enter a date in the Provider End Date field and the Component End Date field so that the new Third Party Partner may add activities in this component for this participant.
Note: Refer to the “Conflicting Components” section on page 34 for more information.
Do not use the [Add Provider] button.
Related Topics
Non-Education, Non-Work Components
Supervised Job Search Component